Ansible, Windows and PowerShell: the Basics – Part 9, Disk Creation
In Part 9 of this series we’ll continue our journey with Ansible, Windows and PowerShell and look at how to handle disk creation. After ‘physically’ adding the new disk, either in a physical server or private / public cloud VM, typically you will need to initialize, partition and format it ready for use.
In Windows Disk Management a newly added disk will look like Disk 2 below:
The following example will demonstrate how to use a combination of a PowerShell command and the win_disk_facts, win_partition and win_format modules to initialize, partition and format the above newly added Disk 2.
Our job template in AWX is _8_initialize-partition-format-disk

Note: I have made use of the ‘Prompt on launch’ checkbox for extra variables.
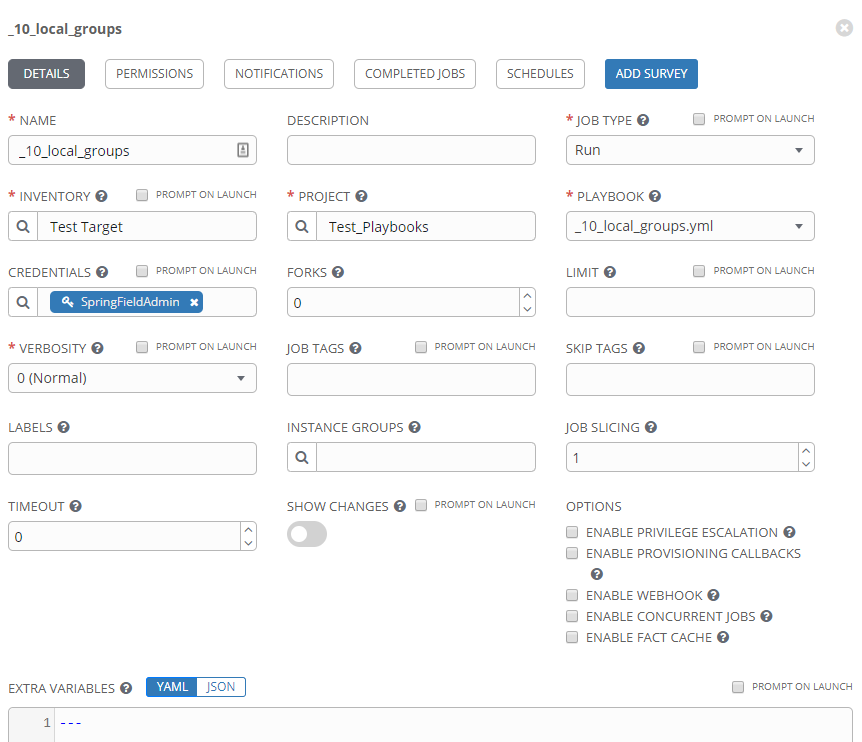
This means when executing the playbook via the web UI we’ll be prompted to amend the extra variables if we want to, i.e. for a different disk number or drive letter.
The contents of _8_initialize-partition-format-disk are are follows:
We start out by retrieving disk facts via win_disk_facts . These extra facts are then available to us via the fact ansible_disks. We use a when clause on the subsequent steps to only execute them when the guid property is null, i.e. the disk has not been touched yet.
There is no Ansible module yet which supports initializing the disk, so we send a PowerShell command using the Initialize-Disk cmdlet to configure that part. Subsequent steps use the win_partition and win_format modules to create a partition with the specified drive letter and then format it with NTFS and a drive label of Data.
Running a job from the _8_initialize-partition-format-disk job template produces the following result:
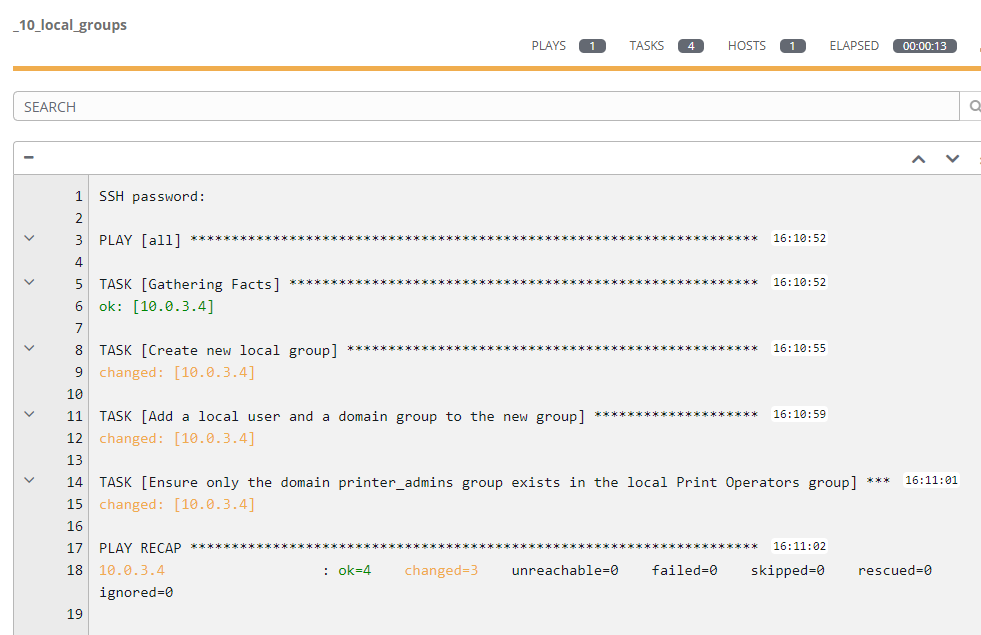
Checking our disk back in Computer Management we observe that it has been brought online, partitioned and formatted.
- Ansible, Windows and PowerShell: the Basics – Introduction
- Ansible, Windows and PowerShell: the Basics - Part 1, Windows Services
- Ansible, Windows and PowerShell: the Basics - Part 2, Install PowerShell Modules
- Ansible, Windows and PowerShell: the Basics – Part 3, Windows Roles and Features
- Ansible, Windows and PowerShell: the Basics – Part 4, Invoking PowerShell Code
- Ansible, Windows and PowerShell: the Basics – Part 5, Example PowerShell Error Handling
- Ansible, Windows and PowerShell: the Basics – Part 6, Displaying Output from PowerShell Code
- Ansible, Windows and PowerShell: the Basics – Part 7, Utilising PowerShell DSC
- Ansible, Windows and PowerShell: the Basics – Part 8, Rebooting & Waiting
- Ansible, Windows and PowerShell: the Basics – Part 9, Disk Creation
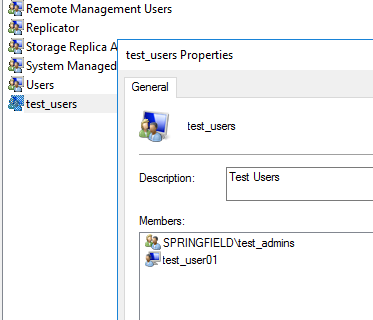
- Ansible, Windows and PowerShell: the Basics – Part 10, Local Users
- Ansible, Windows and PowerShell: the Basics – Part 11, Local Groups
- Ansible, Windows and PowerShell: the Basics – Part 12, Set TimeZone
- Ansible, Windows and PowerShell: the Basics – Part 13, Environment Variables
- Ansible, Windows and PowerShell: the Basics – Part 14, Registry Entries
- Ansible, Windows and PowerShell: the Basics – Part 15, Install Chocolatey Packages